
Overview of the Kalima Admin Administration Tool
The Kalima Admin administration tool allows the management of data shared with authorized nodes of the blockchain. All its actions are historicalized to add security and traceability to the data. Data history cannot be modified or deleted.
Connexion
When you access Kalima Admin, you will arrive on the Kalima Authentication system:
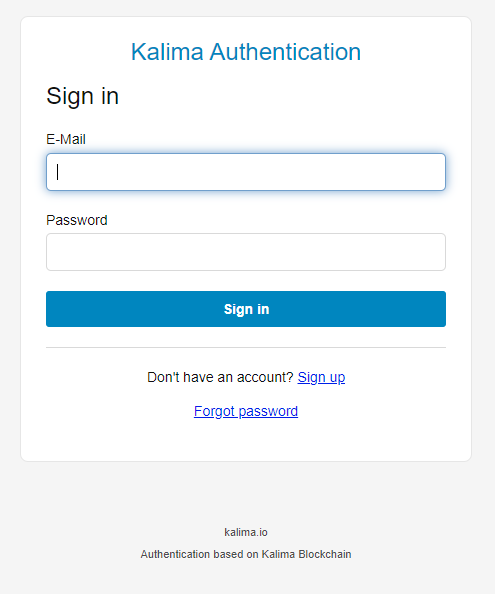
Figure 1 – Connexion to the Kalima Admin tool
If you already have an account, you can just fill in the form with your login and press "Sign in", otherwise, see the rest of this part.
If you do not have an account, click on the "Sign up" link. You will then be taken to the registration form:
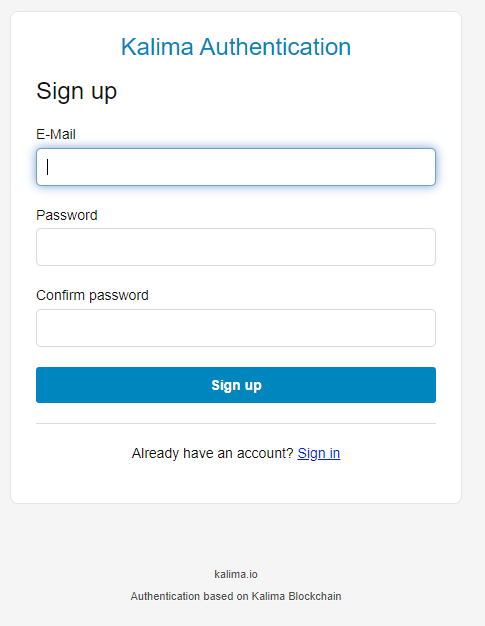
Figure 2 – Registration form
You will then arrive on the verification of your email address, indeed, an OTP code of 6 digits will have been sent to your mailbox. Please use a real email address otherwise you will be blocked at the next step. Then enter your information (email address and password). Attention, the password must respect several conditions:
- length: 8 characters
- at least one capital letter
- at least one lower case letter
- at least one number
- at least one special character
Once the information is entered, press the "Sign up" button.
You will then arrive on the verification of your email address, indeed, an OTP code of 6 digits will have been sent to your mailbox. You have 1 minute to enter this code on this form:
Figure 3 – Validation of the email address with OTP code
Once you have entered the OTP code and pressed the "Verify" button, you will reach the end of the registration process with the following message:
Figure 4 – Account creation massage
You will have to wait for an administrator to authorize you to access Kalima Admin. The process is quite fast, the administrators will be directly notified of your account creation. When you are authorized, you will receive a confirmation message that you can now login. You can then go to the " Sign in " page, see the beginning of this part.
Once authenticated you will have access to the following home page of the Kalima Admin administration tool:
Figure 5 – Kalima Admin Administration Tool Home Page
To log out of the Kalima Admin administration tool, click on the username at the top right of the screen and make "Logout".
In the menu located on the left of the screen you have a list of tabs, each of these tabs integrates sub-tabs and / or a set of addresses.
Remark:
To organize the data in the Kalima blockchain, we use addresses. This can be seen as a file system with folders and files that will contain the data.
KName tab
To modify a transaction in the Kalima blockchain it is necessary, in addition to useful data and identity data, to specify an address.
In fact, each transaction is placed in a database that can be seen as a file system. The address simply corresponds to the path on which we want to store our transaction. The Notary govern the possible paths, it is not possible to edit a transaction with an address that does not exist.
The modification of data display in the Kalima blockchain is done in a dynamic way, it is possible thanks to the Kalima Admin administration tool. To edit an address, you can follow the steps below:
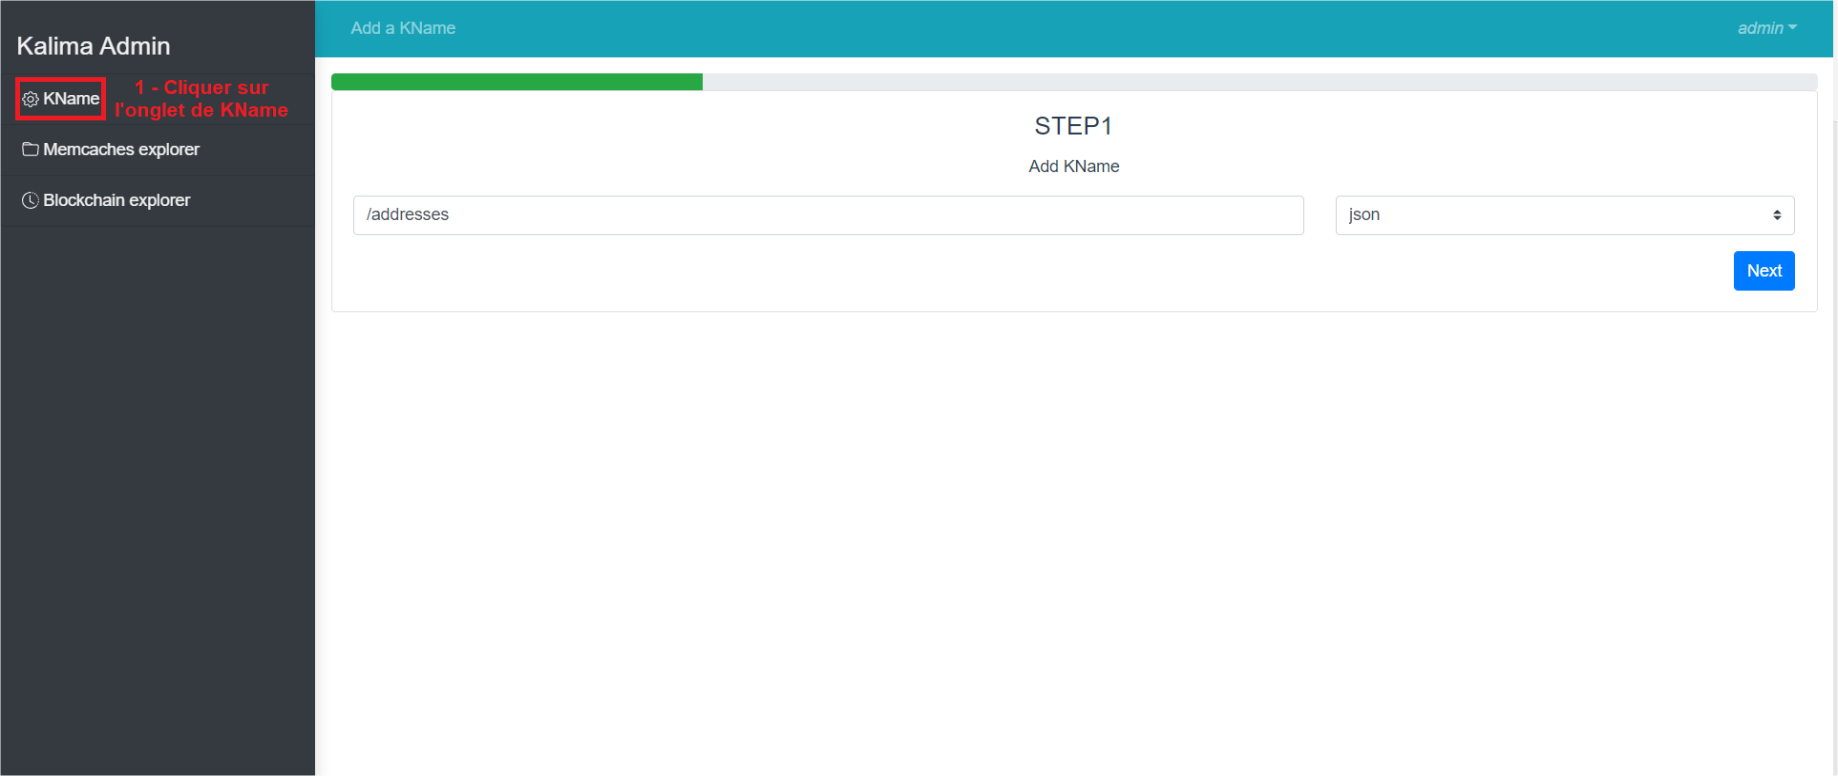

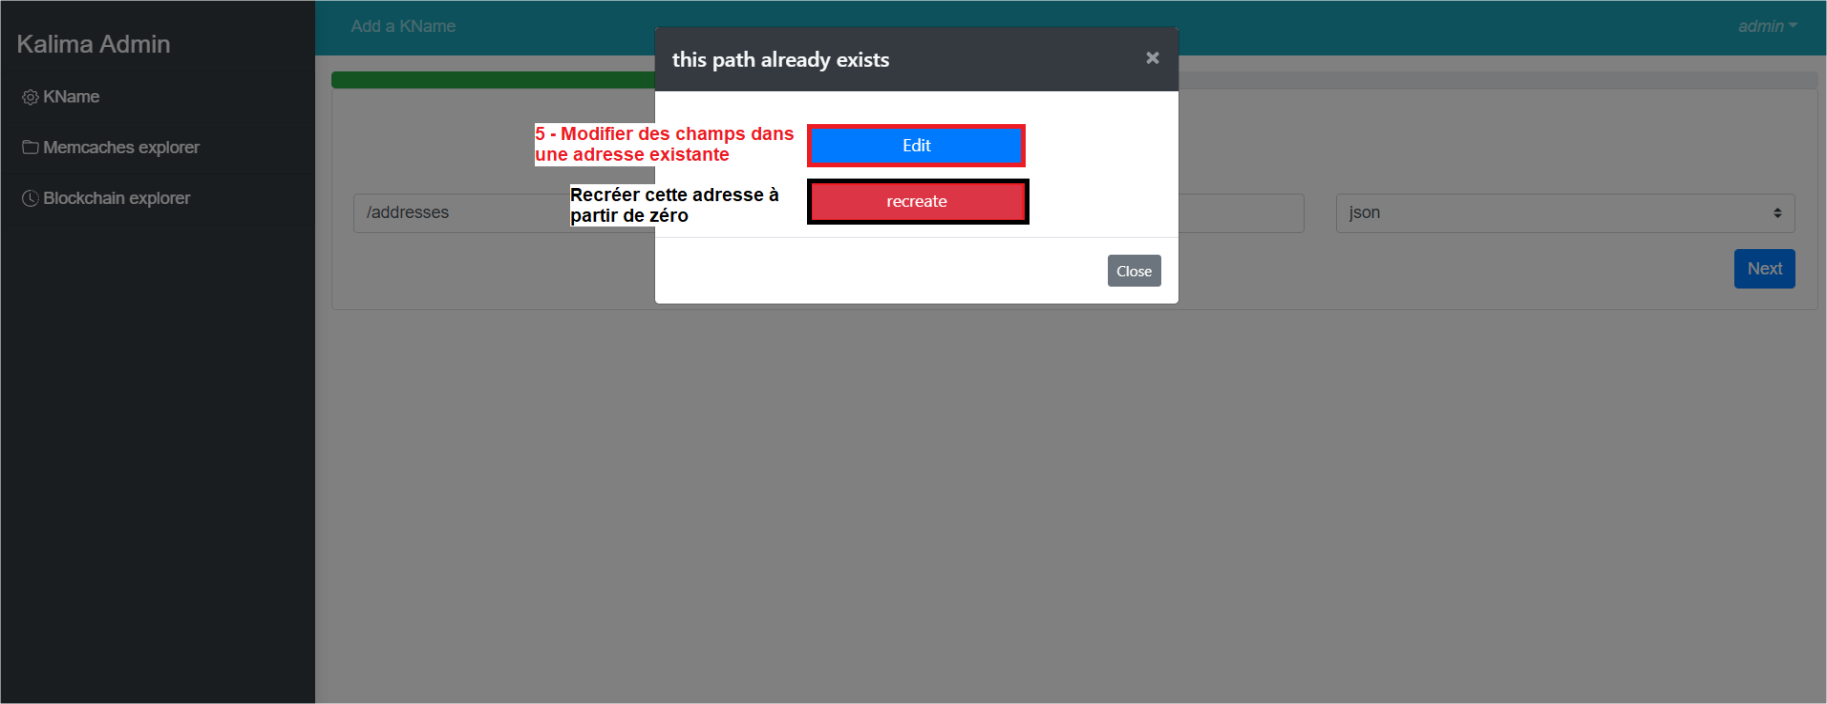
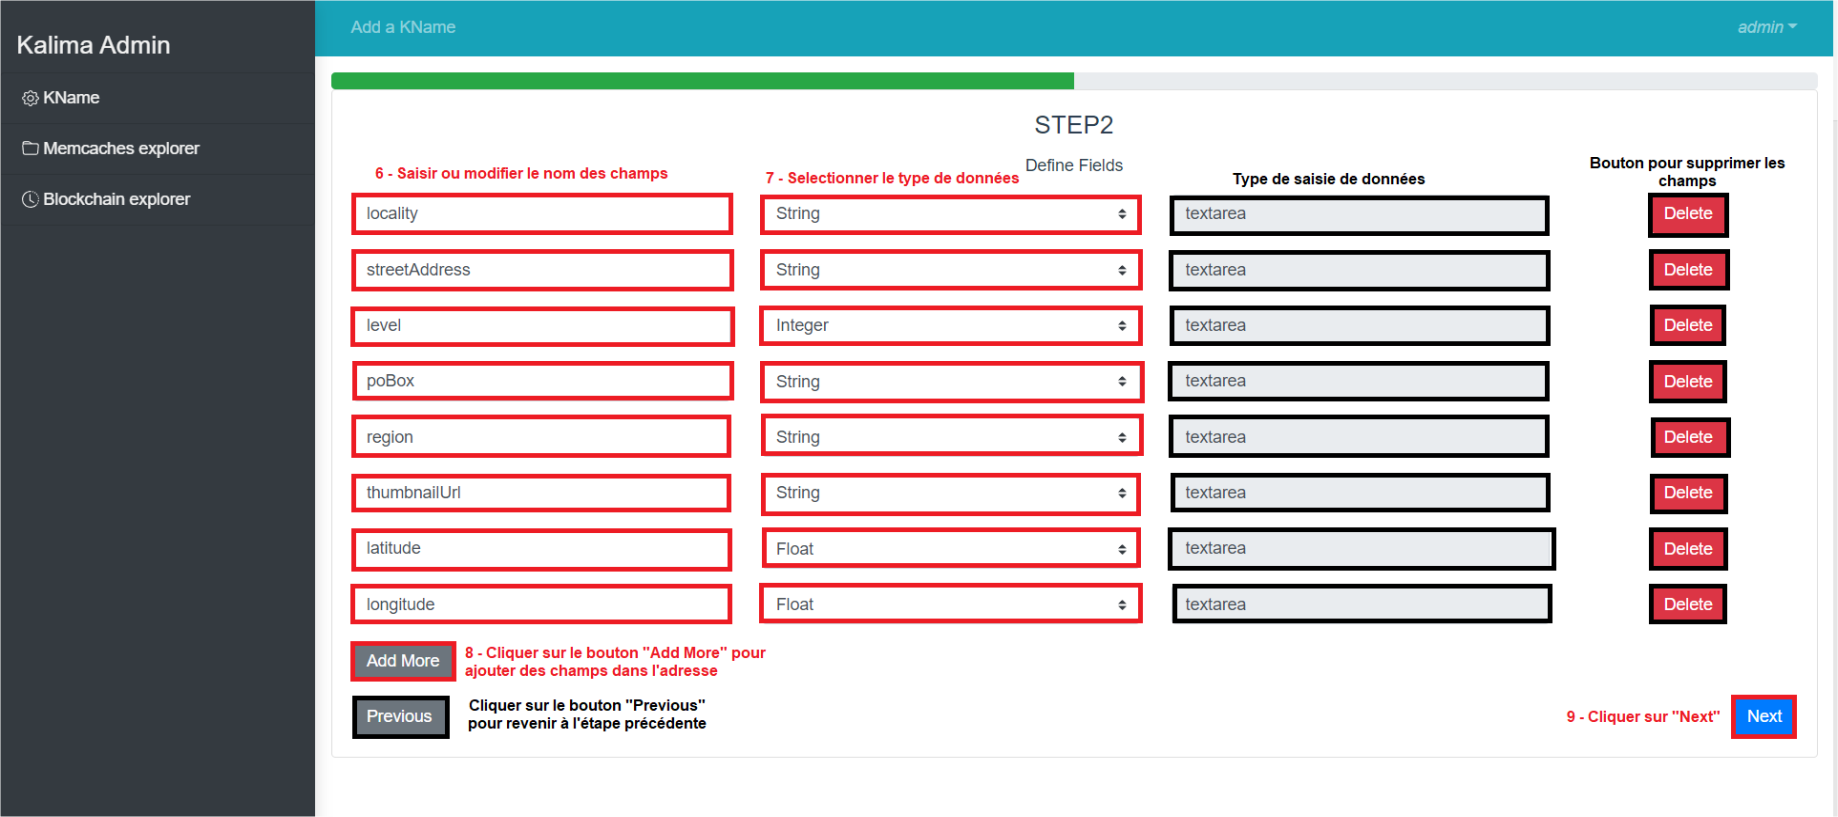
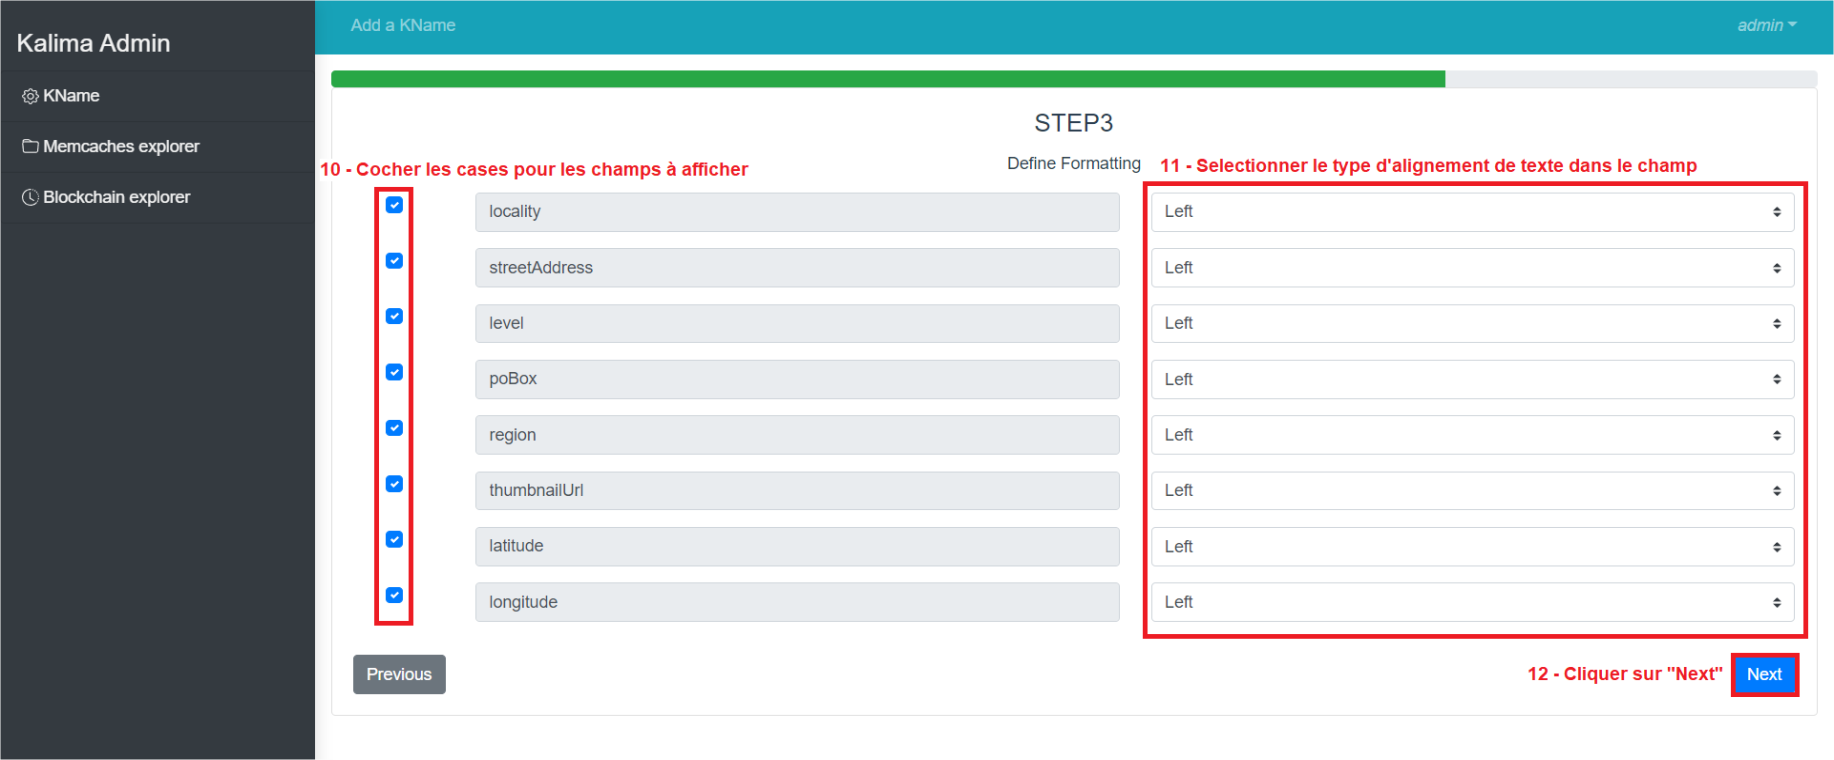
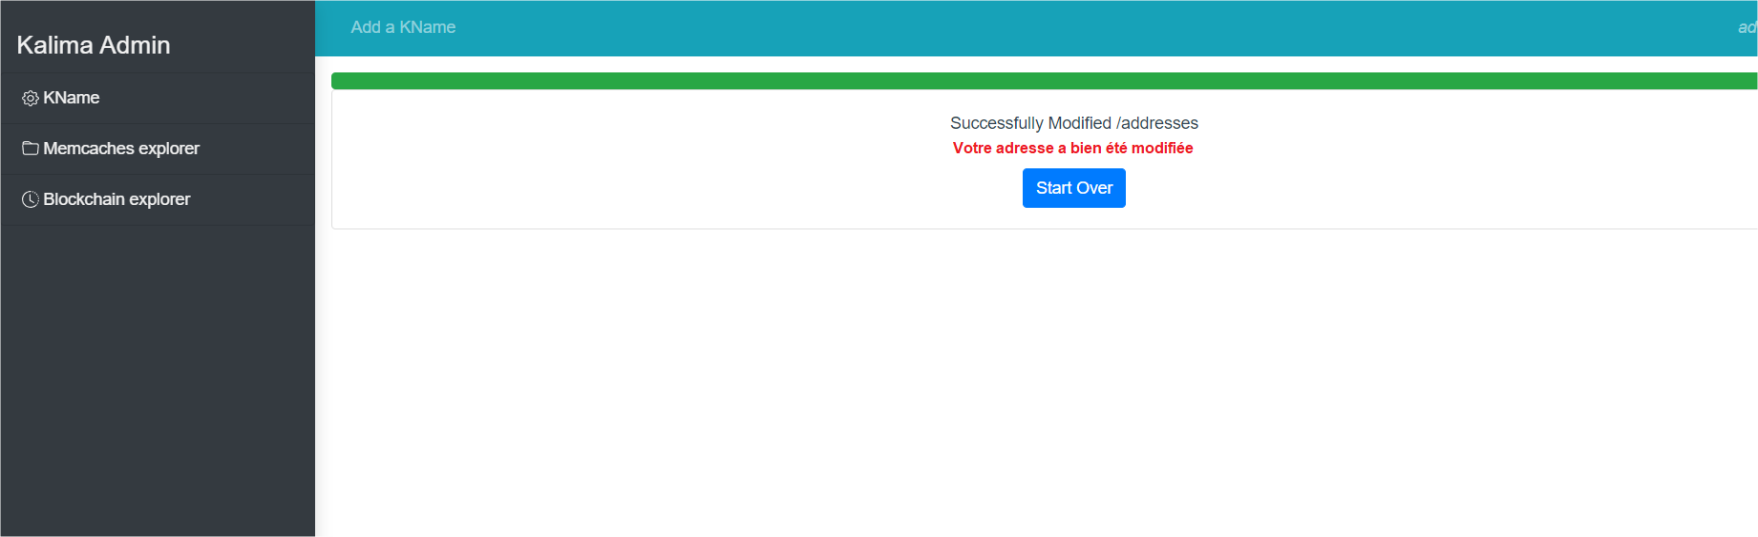
Figure 6 – Steps to edit an adress
Memcaches explorer tab
Kalima "caches" contain all current data and are shared between all nodes of the Blockchain (according to permissions).
The data in caches can be modified, deleted, new ones can be added. However, each action corresponds to a new transaction, and is therefore registered in the blockchain. In addition, it is possible to perform search operations on the data of an address in the Memcaches explorer tab.
In the Memcaches explorer tab of the Kalima Admin administration tool, the most recent data is displayed at the top and the least recent data is displayed at the bottom of each page.

Figure 7 – Buttons to navigate through the data of an address
Buttons navigation between data pages:
There are 4 buttons (top right) that allow you to navigate through the data:
-
Button to move to the next data page,
-
Button to return to the previous data page,
-
Button to return to the first page of data,
-
Button to display the last page of data.
Creating new data:
To create a new data you can follow the steps below:
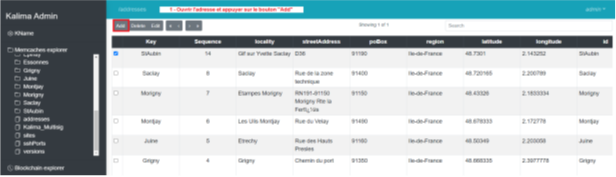
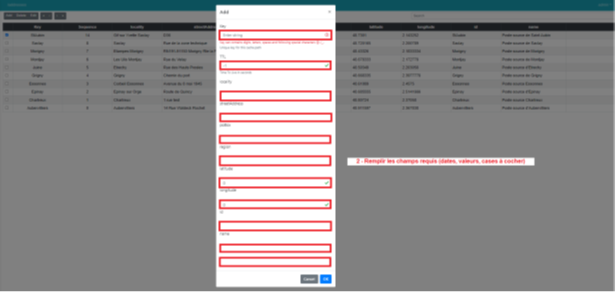
Figure 8 – Steps to add data within an address
Remark:
-
Each address cache has its own fields, so for the creation of a new data in a specifice address e, you must fill in the fields displayed in the pop-up.
Modification of a data
Once created, a data can be modified. To make this change you can follow these steps:
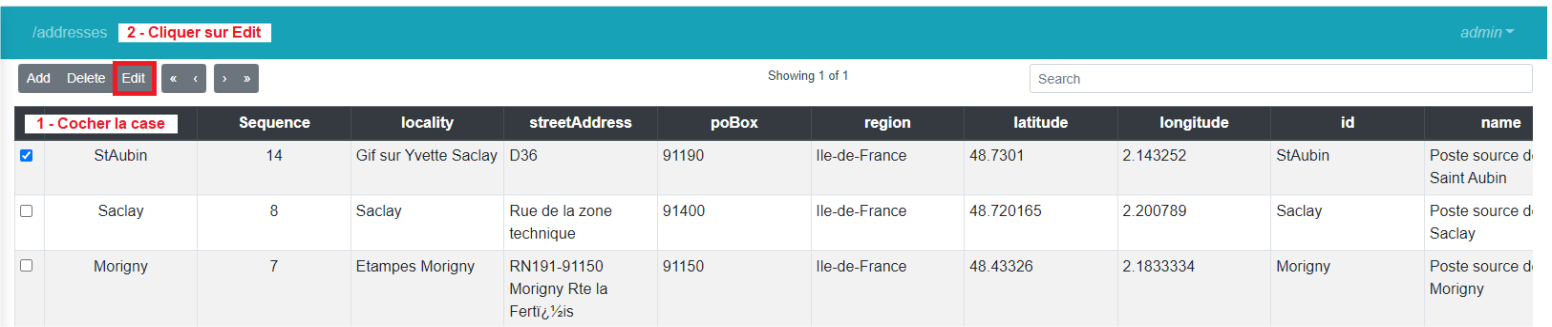
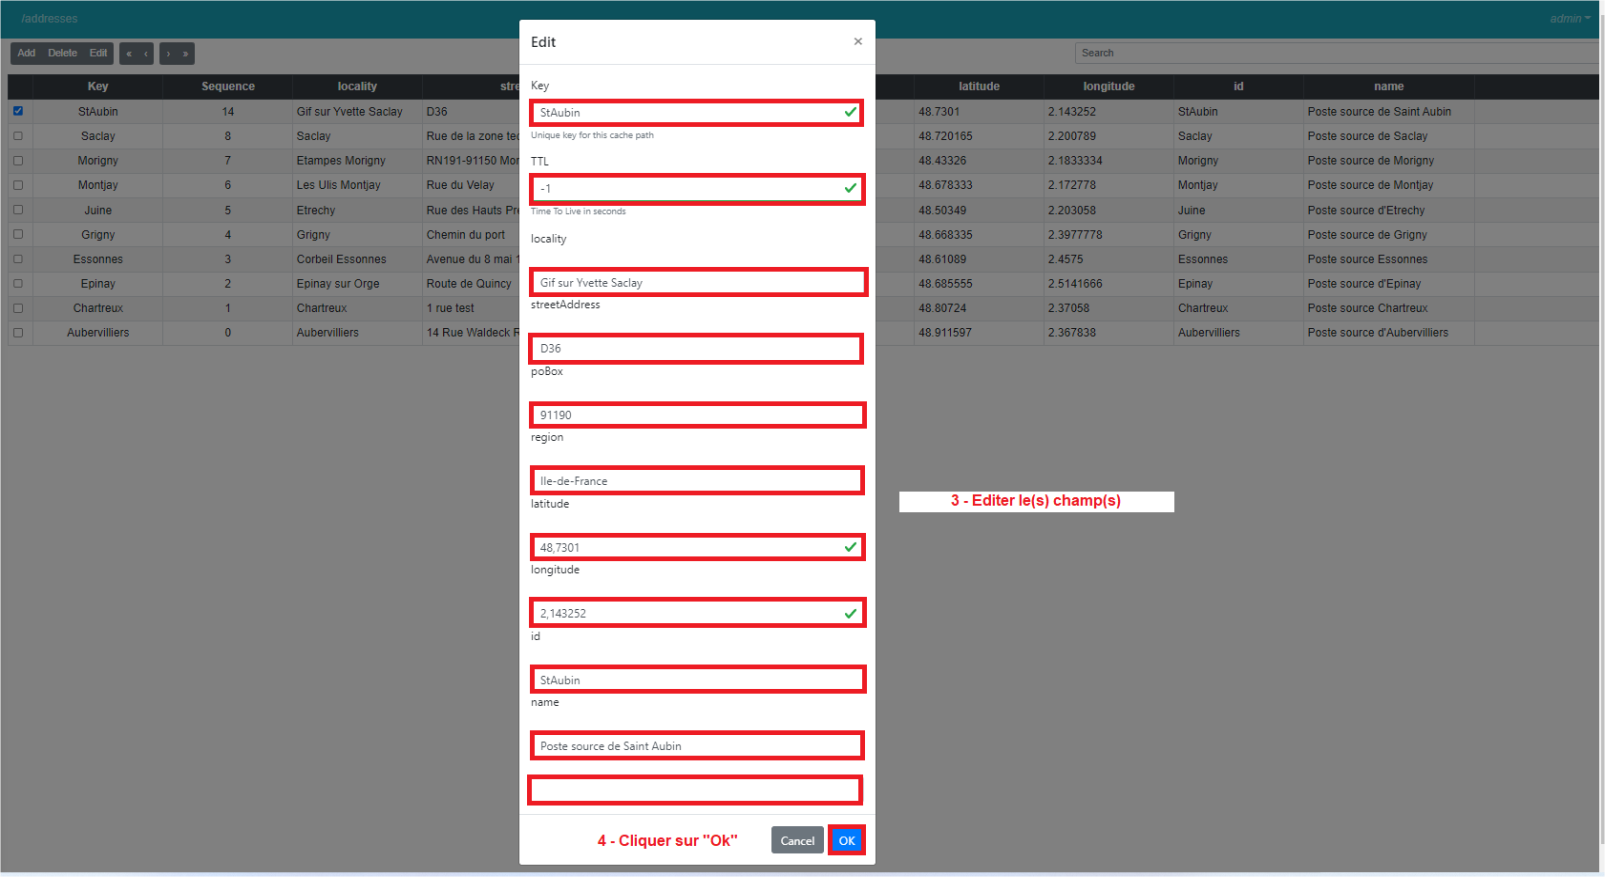
Figure 9 – Steps to change data in an address
Delete data
To remove data from the Memcaches explorer tab you can follow these steps:
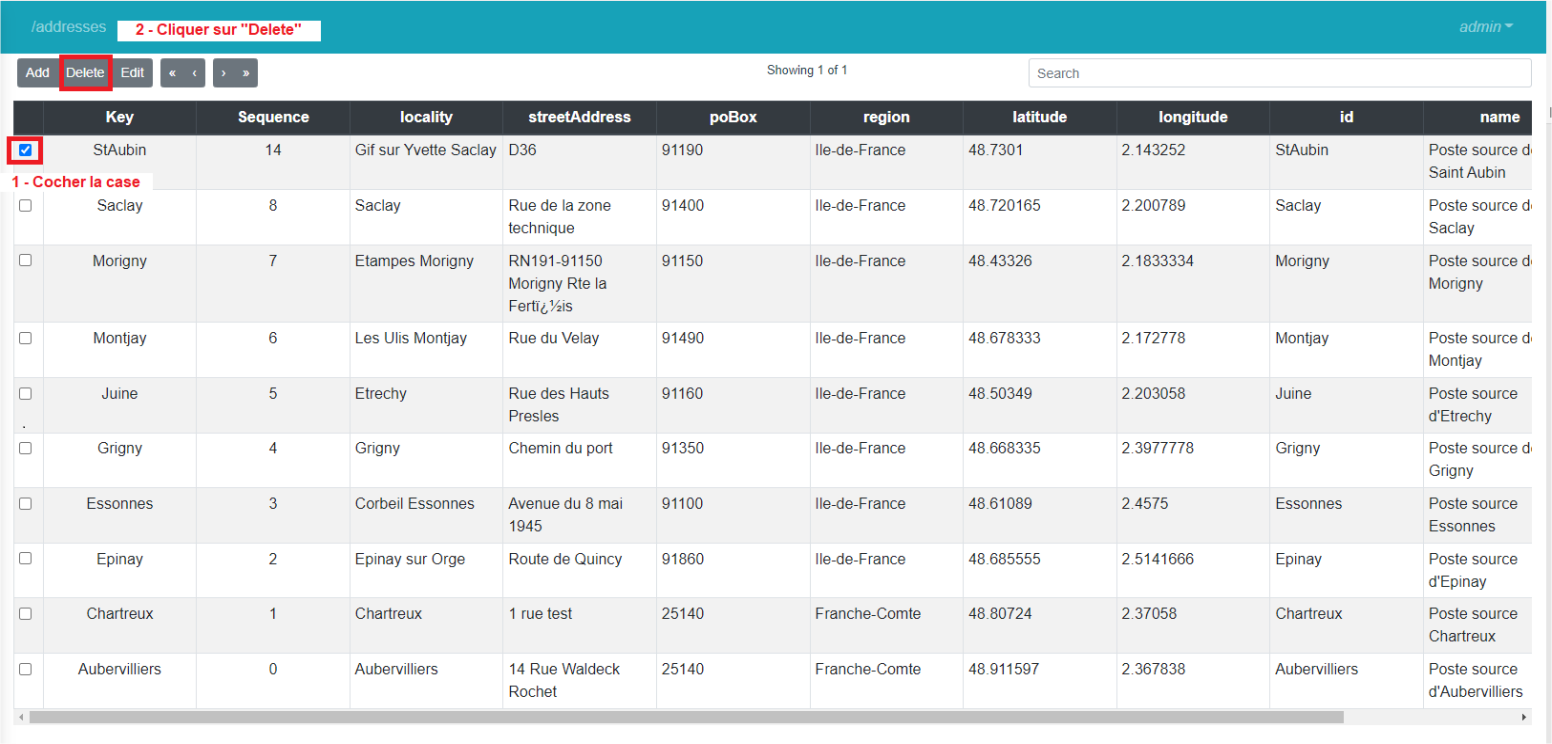
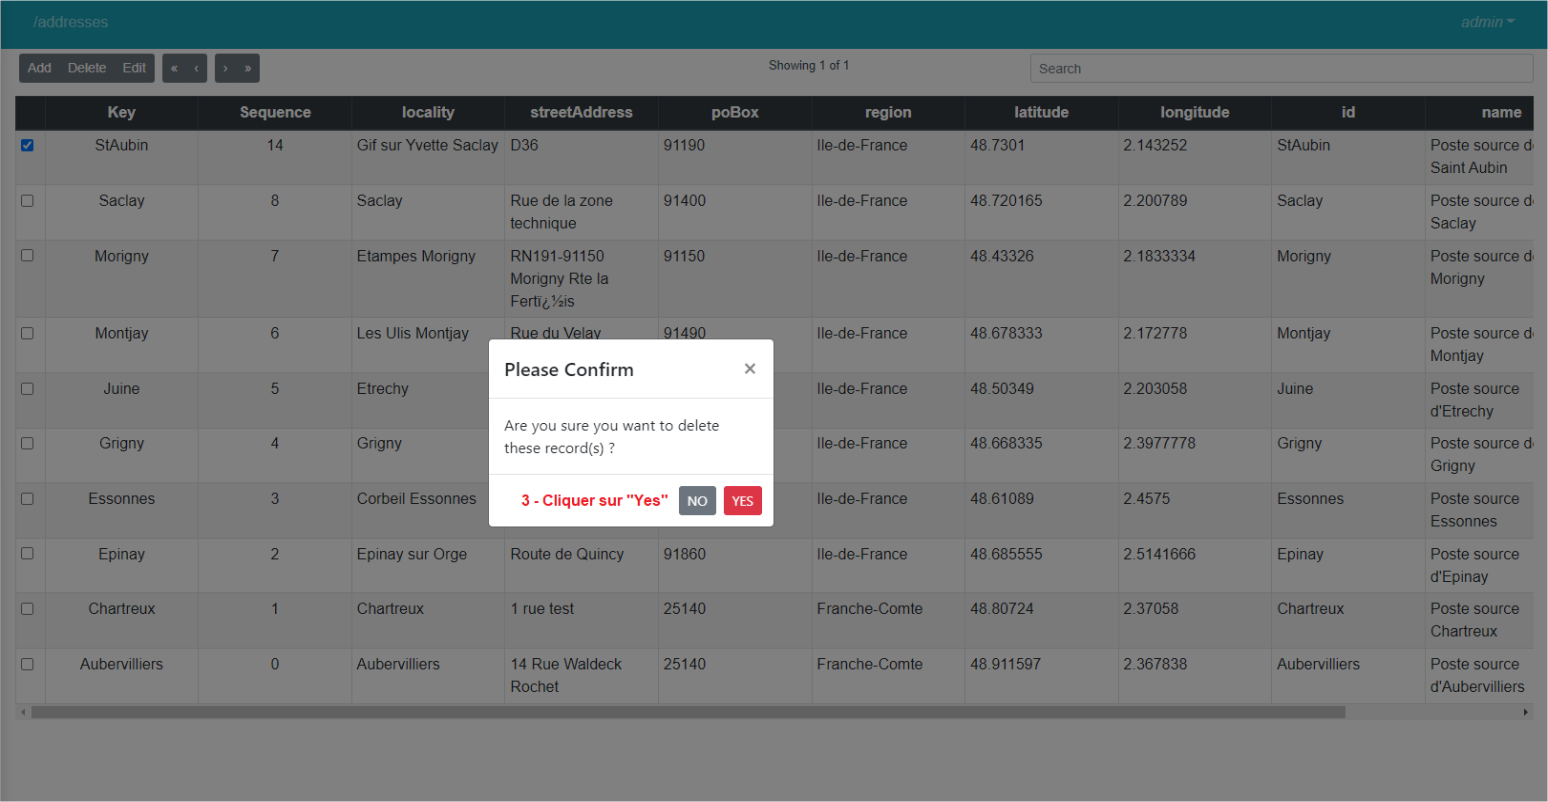
Figure 10 – Steps to delete data
The "Blockchain explorer" tab contains absolutely all the data of the Kalima blockchain. One can see all the transactions that have taken place on the Blockchain, including data deletions.
This tab has a feature of sorting data by sequence.
In the Blockchain explorer tab of the Kalima Admin administration tool, the most recent data is displayed at the top and the most recent data is displayed at the bottom of each page.
Sorting by sequence
Each transaction has a unique sequence number.
The Kalima Admin administration tool offers the possibility to apply a data sorting filter between two precise sequences using the "By sequence" button. To sort by sequence you must follow the steps below:
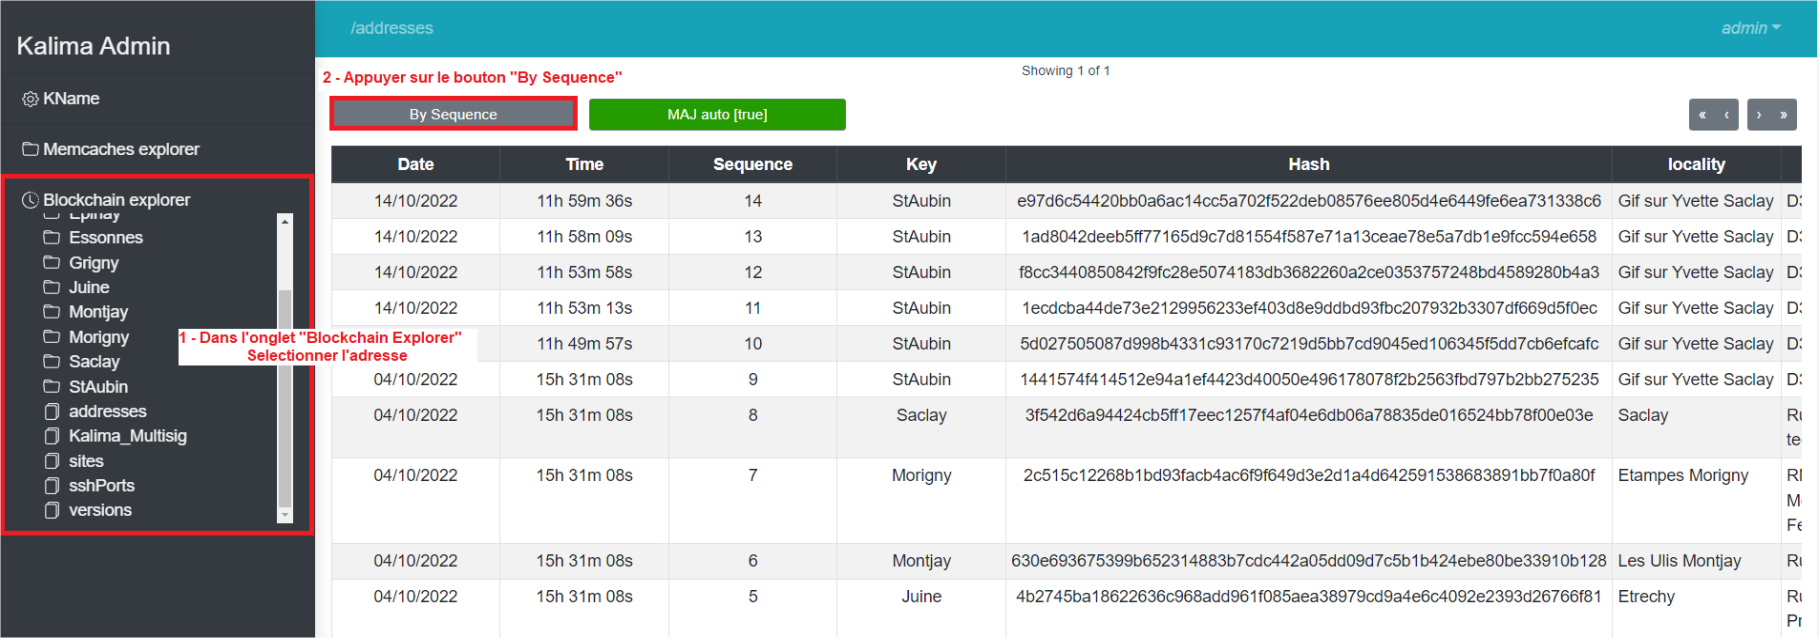
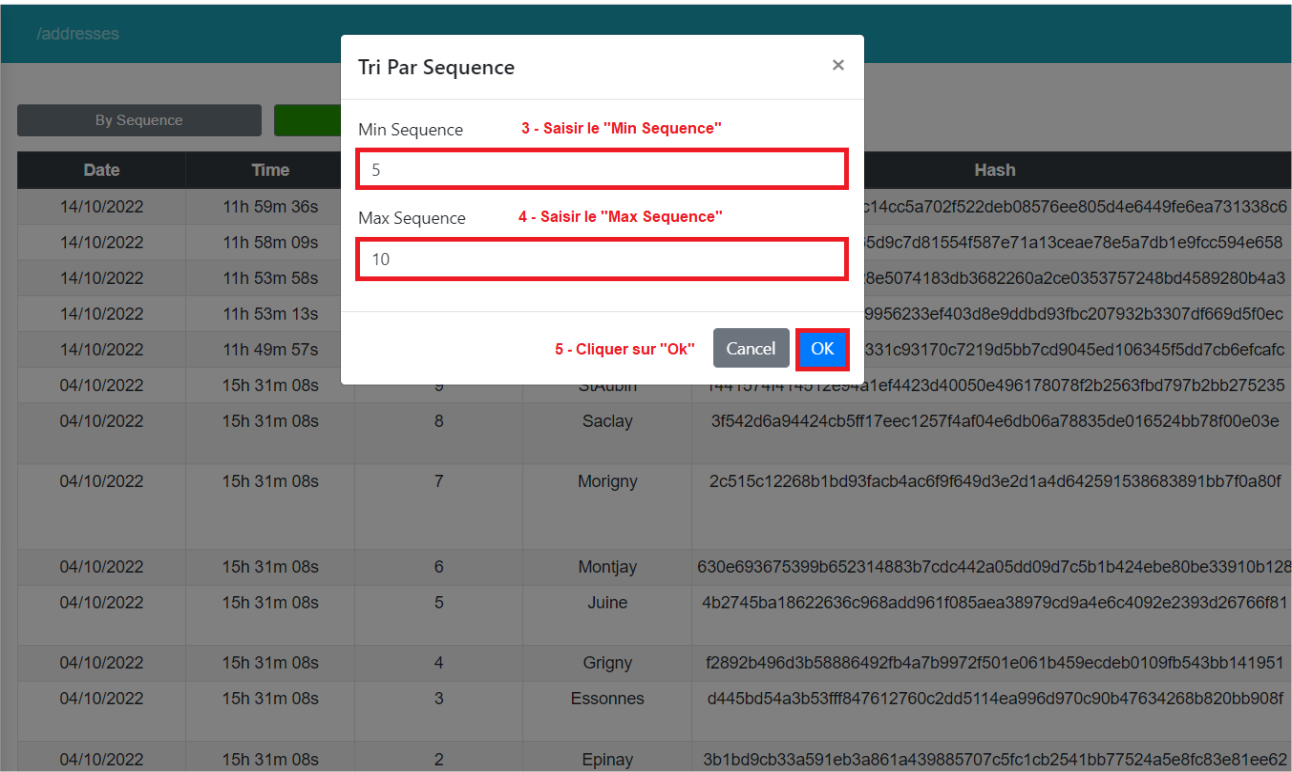
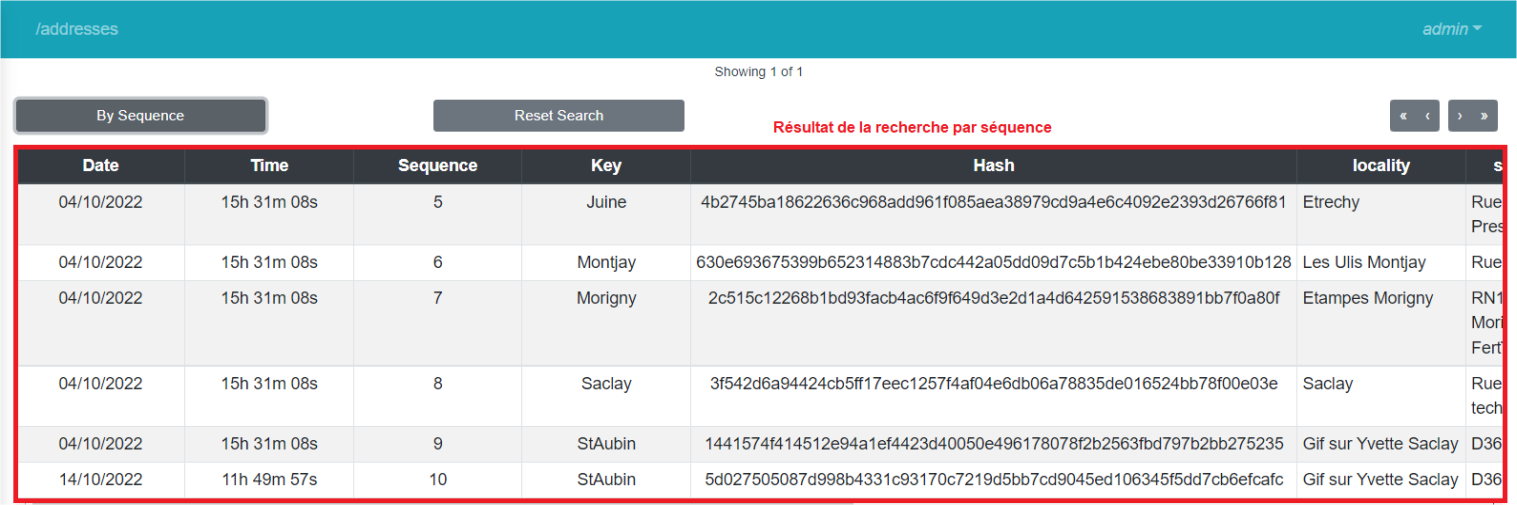 Figure 11 – Steps to sort data by sequence
To redisplay all the data present before the sequence sorting application, simply click on the "Reset Search" button:
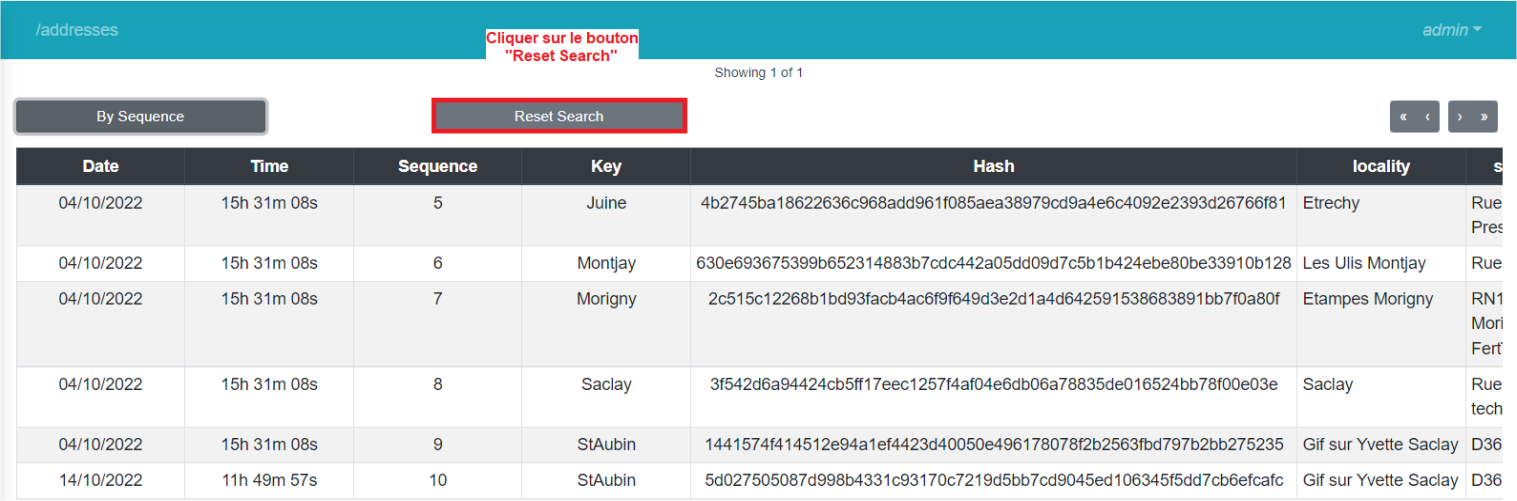
Figure 12 – "Reset Search" button
As is the case for the other tabs, the "Blockchain explorer" tab contains buttons allowing navigation between data pages. These buttons have the same functioning as other tabs.
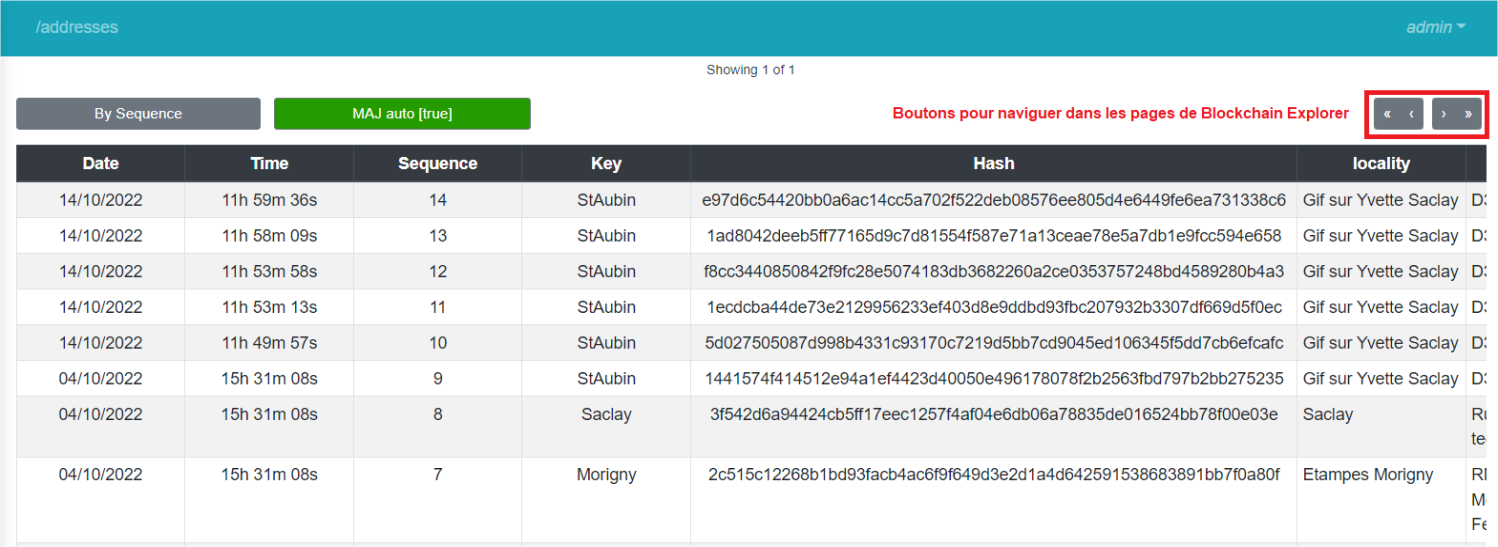
Figure 13 – Navigation buttons between Blockchain Explorer pages
Automatic update
The automatic update button is used to automatically update the list of transactions according to its status:
-
if it is green (true) then the update is automatic so new transactions are added to the list as soon as they are issued;
-
otherwise, it is red (false) which means that the update is pending so the list of transactions is frozen in order to prevent a new transaction from shifting the following transactions by causing them to change line or even page.
When the button changes from false to true, the list is reloaded to show all new transactions.
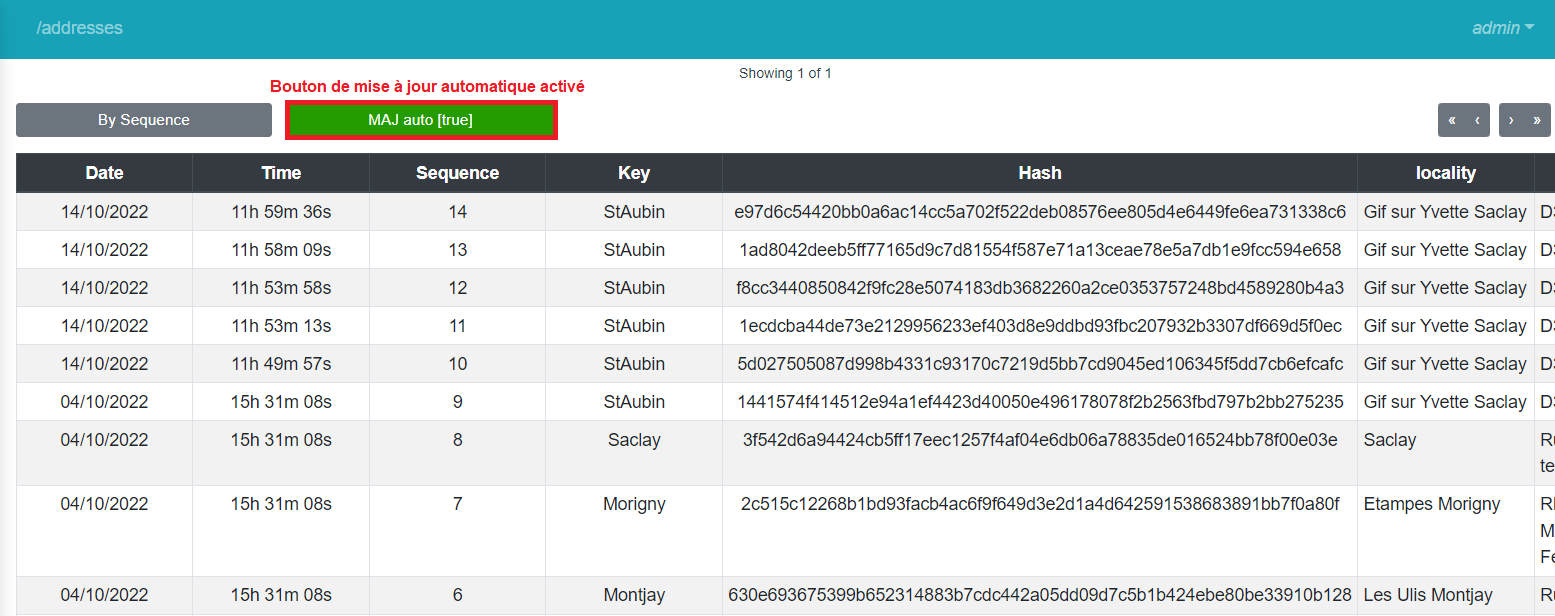
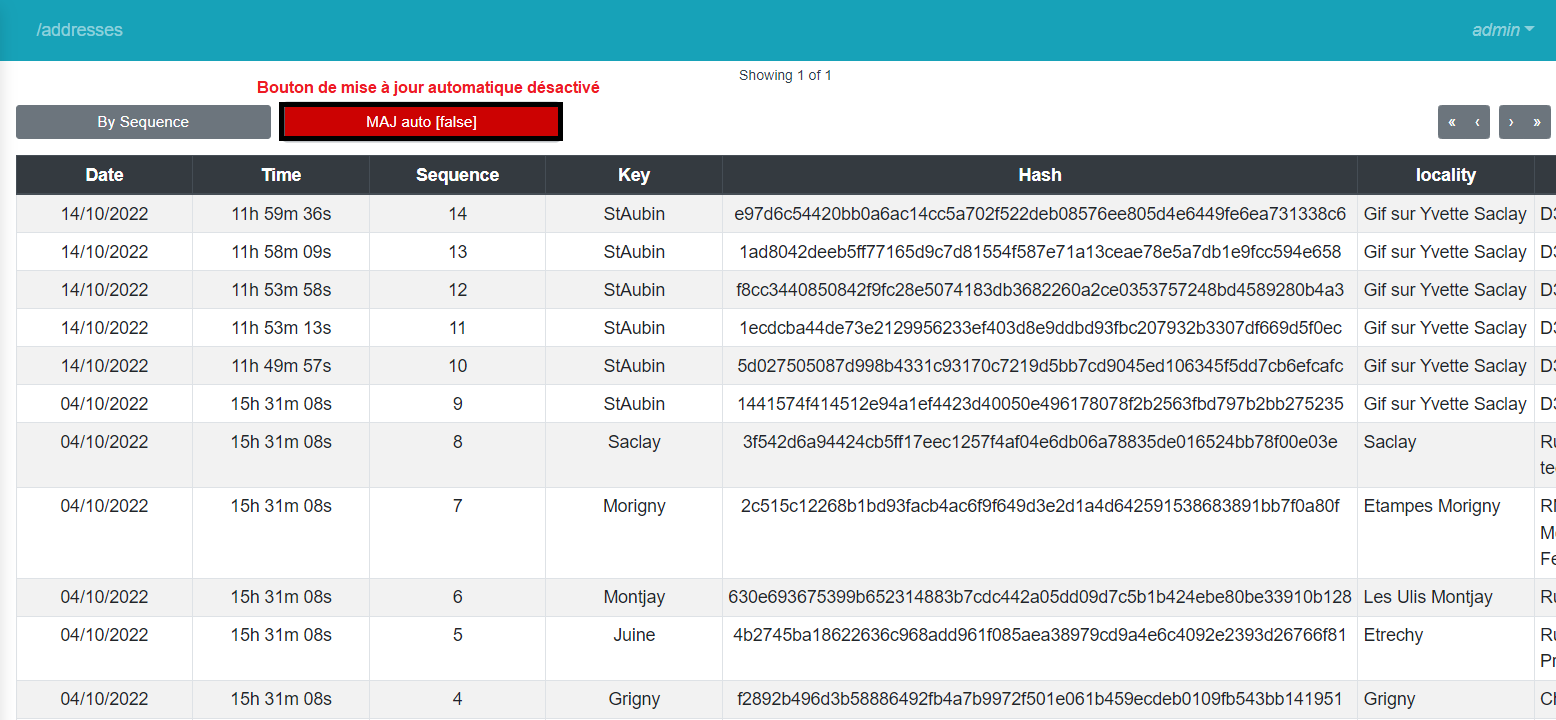
Figure 14 – Automatic updates buttons of Blockchain Explorer