Develop a smart contract node
Prerequisite
To use the Kalima Java API, it is recommended that you have previously read the documentation API_Kalima and have installed the Java JDK in its version 11 at least.
To develop a smart contract node, it is better to have read the documentation API_Java, because the Java API can be used in smart contracts to create new transactions for example.
A complete example of a smart contract node is available on our public GitHub: SmartContractNode
Configuration
The Kalima api is provided in the form of a JAR, there are two versions:
- Kalima.jar Contains the necessary elements to create a Kalima node capable of connecting to a Kalima Blockchain, performing transactions on the blockchain, and reacting in an event-driven way to the creation of new transactions (this makes it possible to create Java smart contracts)
- KalimaSC.jar Also includes the ContractManager which offers the possibility to launch smart Javascript contracts
To use the Kalima api in your project, simply include the jar of your choice in your dependencies.
For this example, we will take KalimaSC.jar.
Contract Manager
The KalimaSC API, unlike the Kalima API, embeds a ContractManager module.
This module allows you to detect the arrival or modification of new contracts, then decrypts, verifies, and installs them. It also makes it possible to launch smart contracts according to the rules of our choice.
For this example, we will create a smart contract node that will execute smart contracts when creating new transactions on the blockchain. If a transaction arrives at the /alarms/fire address for example, then this smart contract node will execute the alarms/fire contract.js passing it the following parameters:
- The message received in the form of a KMsg, which will process the data received in the smart contract
- The clone of the node, which will allow for example to create transactions, or to read other data from the blockchain
- A logger, allowing you to add logs to log files
Implementation
We will detail here two types of implementations: a basic implementation, that is to say with the generic code provided and an implementation "from scratch" to allow in-depth development to better meet your technical needs.
Basic implementation
You will find a basic example ready to use, which you can directly import into Eclipse for example:
The code consists of three classes: a Client class, a CacheCallback class, and a KalimaClientCallBack class.
Launching the node
You need to make a local copy of the code, then launch it on your editor (Warning: this project has been tested since Eclipse).
When launching Eclipse, click on the "File" tab and then "Import" to open your local project.
It breaks down as is:
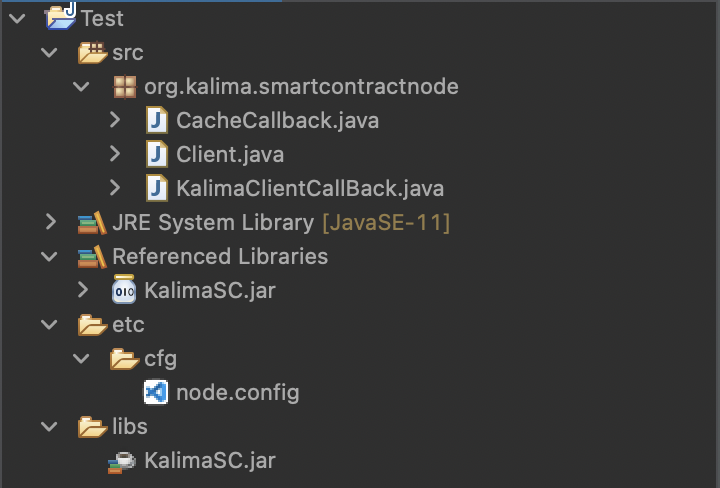
It is a tree structure of a classic Java project, by adding a node.config file for the configuration of the node.
A basic file is provided. This must be modified according to your testing needs before you can launch the code. For more information about this file and how to configure it, see the "Configuration File" section below.
Once the node is set correctly, you can launch the main method with the green arrow "Run" by taking care to insert the arguments that we described in the Client class. Click on the drop-down menu next to the "Run" button, then on "Run Configurations", and finally on the "Arguments" tab to provide the arguments to the main method. We can then launch the program.
Configuration file
To initialize a Kalima node, you must provide it with some information that is loaded from a configuration file, for example:
https://github.com/Kalima-Systems/Kalima-Tuto/blob/master/SmartContractNode
SERVER_PORT=9100
NotariesList=167.86.103.31:8080,5.189.168.49:8080,173.212.229.88:8080,62.171.153.36:8080,167.86.124.188:8080
FILES_PATH=/home/rcs/jit/KalimaJavaExample
# CHANGE IT
SerialId=JavaExample
- SERVER_PORT: Each Kalima node is composed of several "clients", and a "server". Although in the majority of cases, the server part will not be used for a Kalima client node, a port for the server must be specified. You can choose the port you want, taking care to choose a port that is not already used on the machine.
- NotariesList: This parameter allows you to define the list of Notary Nodes on which we want to connect our node. The list above allows you to connect to the blockchain dedicated to tutorials.
- FILES_PATH: Specifies the folder in which the files necessary for the operation of the node will be stored. In particular, you will find the logs of the application.
- SerialId: For the connection to succeed, your node must be authorized on the blockchain. To initiate the connection, a Kalima administrator must create a temporary authorization (valid for 5 minutes). This temporary authorization is done through the SerialId. One can allow a node on a list of addresses, read or write. The node will therefore have access to transactions from all addresses on which it is allowed to read or write, but it will be able to create new transactions only on the addresses on which it is authorized to write.
Implementation "from scratch"
It is considered here that the Kalima node is alreadyinitialized. Otherwise, you must refer to the documentation API_Java to correctly configure your node.
MemCacheCallback
You can start by creating a class that implements the MemCacheCallback interface. An instance of this class will then be created for each address on which our node is allowed.
This class will allow us to react to the arrival of new transactions. It is therefore here that we will decide to execute our contracts. To react to the arrival of new transactions, we will implement our code in the putData function which takes 2 parameters:
- key of type String The message key
- msg of type KMessage The message received
The runFunction function of the ContractManager object permet to execute a smart contract, it takes two mandatory parameters:
- The name of the contract in the form of a String. The contract name corresponds to the relative path of the contract by including the name of the git directory. For example, if your "example.js" contract that is in an Example git directory, the contract name will be Example/Example.js. In our case we will pass the name of the directory in parameters to our node, and the rest of the path will be equal to the address on which the data arrived, followed by ". js »
- The name of the function you want to launch inside the contract. In our case, we will always launch the "hand" function.
You can then add as many parameters as you want. These parameters will be passed to the function that one wishes to perform in the contract. In our case, we will pass the received message, the clone and a logger, as explained above.
This will give:
customer. getClientCallBack(). getContractManager(). runFunction(gitRepo + kMsg. getAddress() + ".js","main",msg, client. getClone(), logger);
You can find the full example ofthis implementation here:
ClientCallback
Then we can create a class that implements the ClientCallback interface. Two functions will interest us in this interface: onNewCache and onCacheSynchronized.
At startup, the node synchronizes with the master nodes. That is, it will receive the data on the addresses to which it is authorized.
When data arrives at a new address, the onNewCache function is called. We will be able to create our CacheCallback instances in this function:
customer. getClone().addMemCacheCallback(new CacheCallback(cachePath, client));
When a cache is synchronized, that is, when all the data from an address has been received, the onCacheSynchronized function is called. In addition, contract information is stored at /Kalima_Scripts. So we will use this function to initialize our ContractManager when we have all the information related to the contracts:
if(cachePath. equals("/Kalima_Scripts") && ! contractManagerRun) {
contractManagerRun = true;
contractManager = new ContractManager(logger, "/home/rcs", new ContractCallback() {
@Override
public Properties getContractInfos(String key) {
KMsg contractInfosMsg = client. getClone(). get("/Kalima_Scripts", key);
if(contractInfosMsg == null) {
System. out. println("contract infos not found for " + key);
return null;
}
return contractInfosMsg. getProps(). getProps();
}
});
}
Note that the second parameter passed to the contract manager is "/home/rcs". This will depend on the user of your machine. If your user is "toto", we will replace by "/home/toto".
You can find the full example ofthis implementation here:
Customer
Finally, we can create our main class, which we will call here "Customer" and which will initialize the nœud: